This a quick and dirty list of notes and thoughts for each respective fight in the tier. It’s NOT meant to be comprehensive nor list all the 100% perfect optimization strats, but rather instead to provide tips for some mechanics and list out the answers to some of the most common fight-specific questions I’m seeing. Messy quick doc, but feel free to poke me on The Balance if you have any questions. Alevia#1270
I’m writing this at 3am now it’s 5am – pls no harsh booli.
If you’re looking for general fight vods, I stream regularly and you can poke through my twitch: https://www.twitch.tv/saltedlevity – I’m not flawless – I make plenty of mistakes and these are just VERY rough weeklies (usually featuring a healer lb after all our DPS die), but hopefully they give you a general idea of how to execute some of the notes below).
Fulmination Savage - E5s
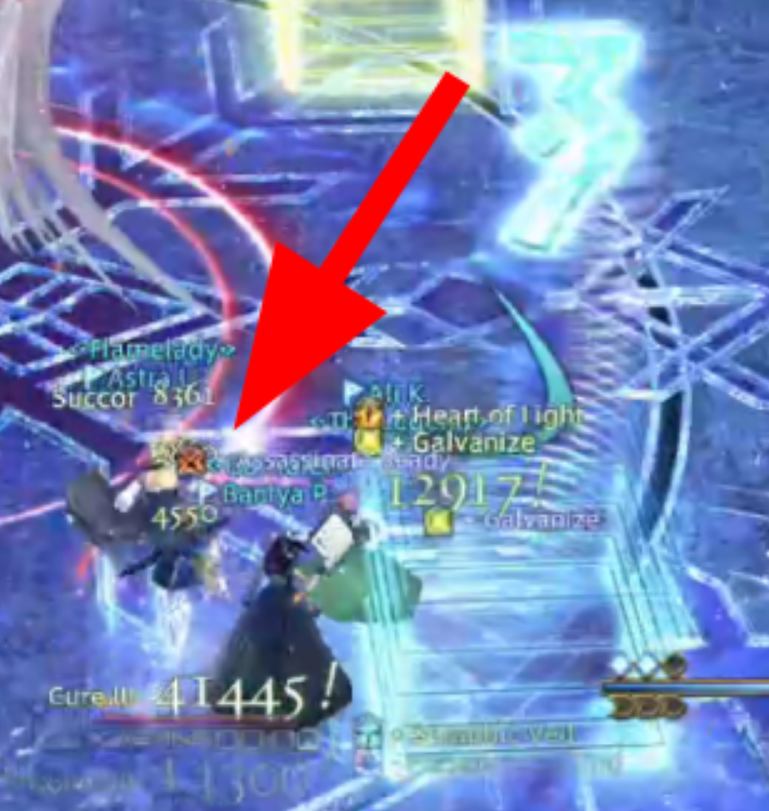
Stratosphere Summons (Nail) Dodge to safe spot
Dia +Swiftcast >Glare should allow you to get to wherever it is. If you’re somewhere close to it already, you can skip the swift.- If your spot for stormcloud summons is opposite to the corner you’re in, start slidecasting towards it as soon as the nail mechanic resolves. Slidecast until your next
Dia refresh and then use that to finish the movement to your spot.
Thunderstorm
- There are some “semi-safe” spots around the arena where puddles seem incapable of spawning exactly on top of. Standing in these spots will let you slidecast all the dodges comfortably.
- Comfy spot in action clip: https://clips.twitch.tv/OutstandingSarcasticPigeonFrankerZ
Fury’s Fourteen
Try to hit a
Furor Savage - E6s
Occluded Front into Pair Markers
Optional approach to healing and moving through it with no non-lily GCD heals:
- At your 30s
Dia refresh, placeAsylum and weaveTemperance . Dodge out to the corner between the line aoes and the round one. - Slidecast into the back edge of the shared puddle, which is targeted on the DPS. You don’t need to go all the way in.
Afflatus Rapture as yourAssize is coming off CD and weave assize, use this to move out of the paired puddle into the safe spot. Should end on the centerline of the arena, making the ferrostorm dodge a simple slidecast to safety.
Transition From Garuda to Ifrit
- Try to dodge the vacuum slice just before this on the south half of the arena – the proximity hit will always spawn north, so this saves you some movement.
- You should have one lily you can blow during downtime
Ifrit Reopener
Dia intoGlare spam, once assize is up,Afflatus Misery >Assize to get both under raid buffs that should be out here. Next assize you can hold for a few seconds to align with dia.- HOLD THE NEXT
Assize FOLLOWING IT.
Ifrit + Garuda
- Hold the
Assize just before these two spawn. You shouldn’t be losing a use over the fight doing this (unless your kill time is in a really tight 15s window of variance BUT even if you do fall in that window, you break even (lose one, but gained one on two)).
Iconoclasm Savage - E7s
What do I do with my lilies for the first 2 minutes of the fight?
- Lul. Nothing. Just sit on them, really.
Note on second Assize and Assize on adds
The timing for adds spawning is such that you need to hold
My suggestion:
If you hold your second
- I find it easier to remember to hold assize at the beginning of the fight, rather than trying to remember to later before adds, so I like holding it this early (this point is really just a personal preference thing)
- The 3rd one will come up at 1:45 which is when the betwixt world knock back happens. You WILL inevitably clip your GCD here for the knockback, but it IS possible to essentially “animation cancel” assize with the knockback. Meaning, when you cast assize, there’s an inherent animation lock so if you don’t weave it with an instant, you clip. However if you time the assize correctly, you can basically have this forced clip from assize happen at the same time as the forced clip from this first knockback. I have not done it consistently, but I have done it enough times. It feels very comfy when you do.
Here’s a clip: https://clips.twitch.tv/JazzyBombasticBearWOOP (just don’t move after like I did, you can slide cast into your spot, I’m just bad.) - Your next one is at 2:30 which aligns with the
Dia there, this is the dia that should haveAssize +Presence of Mind . The assize alignment here is nice because it’ll heal up any damage not yet healed after the empty wave stuff.
Color Dodges
- All color dodges can be done with slidecasts.
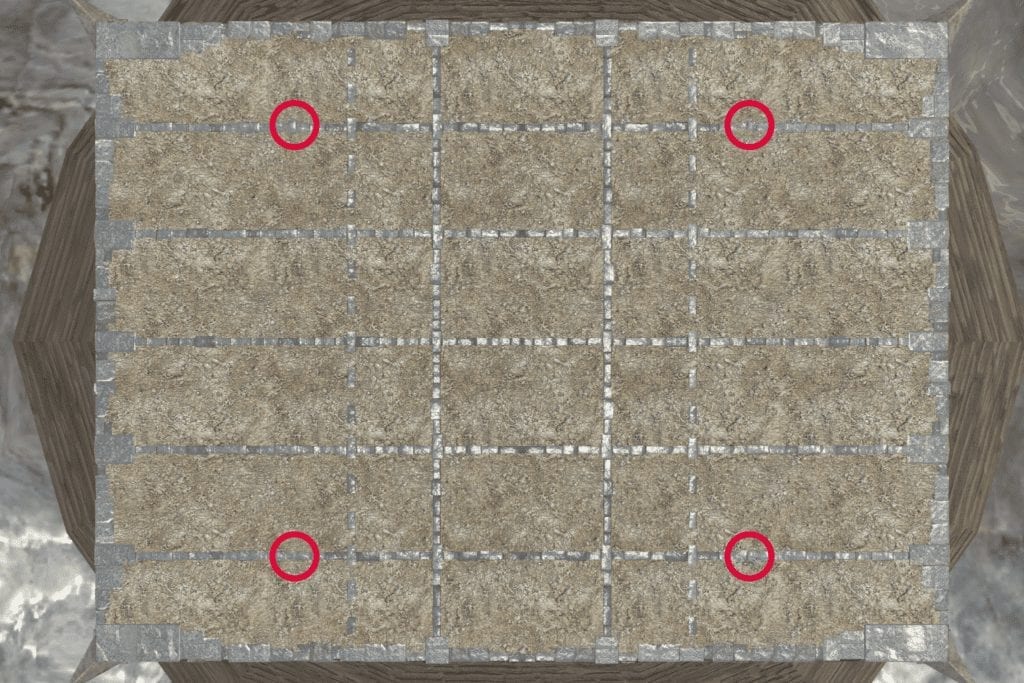
- MOST groups and people dodge on the edge. You CAN dodge in the middle two columns if you understand the pattern. This is helpful on the first set to stay in the middle area where you’ll need to be for the betwixt world mechanics.
If you look at the squares of the arena like this:| ? | ? |
? | - | - | - | - | R
? | 1 | 2 | 3 | 4 | B
? | 5 | 6 | 7 | 8 | R
? | - | - | - | - | B
| R | B |You will always dodge between 2 and 7. If red is safe first (paper went into the blue portal), start on 7. If blue is safe first (paper went into red), start on 2. You follow the same pattern of swapping between them as you would if you were dodging on either edge.
Here’s a clip, in this clip blue was safe first so you want to be on the overlap of blue:
https://clips.twitch.tv/UnsightlyUnsightlyCasetteWoofer
(I think this is technically also doable for the later color dodge phase BUT I wouldn’t because 1) the orange baited puddles will potentially eat entirely into the square unless everyone is coordinated and 2) you have a lot more time after this one to move into the center, the first one you don’t have that leeway).
Away With Thee movement
If you’re still new to the fight PLEASE just respect this mechanic, don’t be cheeky.
- The first one comes up near a natural
Dia refresh – feel free to let the dot fall off for a bit and use dia as your last GCD before you get snapped. The phase one timings will make you lose ticks of dia regardless. - Controller Tips: I play with a controller as well! I find it easiest to turn my camera so that I only have to move my left stick straight up or straight back to turn in the correct direction (rather than keeping my camera fixed and trying to hit the right angle on the stick)
- Don’t be afraid to clip a swiftcast and hit glare before the snapshot if you mis-timed dia or similar, the clip isn’t relevant when you consider the comparison is losing the entire GCD anyways!
- Check the adds phase section for tips on that one
False Moonlight
Hopefully your group is bating in the center for the first orange puddles. As the whitemage you’ll have fewer movement tools than your co-healer, or your ranged DPS players. As such make sure you’re not stuck with the far back corner for your ice puddle drop, you should be one row above.
- You should have either a misery prepped or a rapture leading into this mechanic. PoM should come up before it starts, ending in the middle of your first set of dodges. This is OK just be mindful of how it changes slidecast timings.
- Rapture or Misery out of the orange aoe into your spot. Glare slidecast out of the ice puddle, the snapshot timing is quite forgiving on this
- Rapture/ Misery or Dia before you get snapped, if you’re unsure, swiftcast a glare, again clip is irrelevant.
Adds Phase
Do your best to keep dia up on all three targets, this not only is what you want to do for DPS, it creates a lot more weave and movement windows helping out significantly in this phase.
- Make use of your raptures for movement here. Stick to the middle when you can, moving out to your respective group when it’s time to stack.
- More coming soon, shhhh I’m busy and want to make a good clip of it.
- You shouldn’t need a ton of extra GCD heals for the damage, rapture will cover most, make good use of PI, a medica 2 for safety wouldn’t be remiss, and temperance one one set of aoes can help as well.
Tornado Phase movement
- Use a combination of slidecasts, lilies, dia, and swift weaved with either lilies or dia to cover all of the movement here. You do not need to spam dia.
- This clip covers the basic concept though you’ll notice I don’t execute it very well (a lot of casts are fully dropped rather than slid) should hopefully get you an idea!: https://clips.twitch.tv/SucculentProtectiveSalamanderTakeNRG
- Alternatively if you’re feeling gutsy, you can try to dodge through the spinning arm: https://clips.twitch.tv/DifferentSleepyTarsierKAPOW
Refulgence Savage - E8s
First Biting / Driving and Reflected
- Your 30s dia should come up just before this cast begins.
Dia +Swiftcast >Glare + sprint to dodge the appropriate spot on the wall.Afflatus Rapture +Assize to move from first wall spot to second safe spot.
Shining Armor (Look away thing)
- If you’re in range, turn around and cast
Holy (that’s 140p!), or use a lily. - If you’re not in
Holy range, cast a lily and look away. - Alternatively for the Phase 1 one, reapply
Dia early as the fight ends at an odd time that you’d lose roughly the same amount of ticks – however a later dia lets you dodge the last scythe/axe more comfortably, so your mileage may vary depending on your group’s strat.
Light Rampant
Strats for this mechanic vary, I have mostly only done Ilya’s however as the mechanic resolves more or less the same way I think the following applies more or less. I’ll poke around for how other strats are handled soon.
- As the initial hit goes out you should be able to
Afflatus Misery >Assize +Plenary Indulgence . If your healing scheme is a little different and you don’t have a misery there, rapture in place of it. You should have another. - Single
Glare filler, slidecast into: - Use
Afflatus Rapture to cover your first movement - Single
Glare filler, slidecast into: Dia for second movementGlare s + slidecasts for the next couple of GCDs.Afflatus Rapture as protean goes out ( +Asylum is what I do) to move into the center tower if 3 stacks (and eat my orb if i was an orb person)
As a suggestion, you can hold the
Healing Add Phase
Keep in mind this phase does not count towards your parse. That said you can still be a good egg and help.
Ideally, your previous misery should be used on Shiva, and the one you generate during this phase should also be held for returning to Shiva. HOWEVER during prog or if your group’s DPS is low, definitely feel OK using it in this phase.
Healing Waves:
- First Wave:
Medica II +Assize - Second Wave:
Medica II +Afflatus Rapture +Temperance - Drop
Asylum - Third Wave:
Plenary Indulgence +Medica II +Afflatus Rapture - Fourth Wave: don’t heal until after adds are dead, unless a lightning is up and someone will die from the hit. Try to squeak out an assize if things aren’t dead!
Feel free to adjust the and flex the above as needed.
You get 2
You should still be able to get a good amount of glares in on adds, don’t just sit on your hands.
Phase 3 Re-opener
Assuming you have Misery, these’ll get it and assize under raid buffs and pots without clipping
Clip-less invulned Morn Afah Opener
Clip-less Shared Morn Afah Opener
Wyrm’s Lament
(Aka if you get 2nd or 4th, cry)
- First timer: Preposition north with a
Afflatus Rapture to move & heal +Swiftcast Glare to return to middle - Second Timer:
Dia +Swiftcast Glare (and sprint) to dodge out,Afflatus Rapture to move in - Third Timer: Preposition south using your natural
Dia refresh,Afflatus Rapture to move in - Fourth Timer:
Afflatus Rapture +Swiftcast Glare (and sprint) to dodge out and probably another Rapture to move in (maybe you can do it with just the two GCDs, I use the third for safety if I’m being honest)
Shining Armor + Reflected Shining Armor
SEE UPDATE BELOW
Strategy shamelessly stolen from the BLM Optimization Channels of The Balance:

Position on her butt, basically on the tip of one of the quad diamonds that make up the middle shape, don’t go due middle.
(Clarifying WHM Holy here just so it’s not confused with Shiva’s Holy!)
- First set:
Dia /Afflatus Misery /Afflatus Rapture /Holy (use any of these). I think Dia comes up naturally at this set, so use that if it does. I’m not 100% sure on the timings as my runs have been a little spaghetti. - Second set: Keep casting through the second set (you’ll be looking straight at her and avoiding everything else)
- Third set: If edge Shiva holy:
Afflatus Rapture /Afflatus Misery and move through her to the edge, WHMHoly for the actual gaze part. Rapture after to move out of range for spiteful/embittered - If center Shiva holy:
Afflatus Rapture /Afflatus Misery and move to mid (or if you’re cheeky, glare and slidecast) and face south. WHMHoly if she’s in range, if not, rapture and once the damage has snapped, move south to outrange the spiteful/embittered
Not perfectly executed (that interrupted glare QQ), but this should help show the positioning and stuff: https://clips.twitch.tv/TubularCleverCasettePastaThat
UPDATED NOTES COURTESY OF DialaceStarvy
(I’ll mesh everything together later when I get a chance)
The fact that I’m copy pastaing this exactly from the original google doc on week like 50 or whatever we’re on should probably tell you how likely I am to integrate this with the above.
- If Shiva’s Holy is in the middle you shouldn’t go through her but instead run through the middle of the arena to go away from her. That way you can be out of both the kick mechanics.
- The only gaze you have to respect and maybe cast Holy is the first one. For any gaze after, it is safe to look at Shiva and cast Glare, provided positioning is correct.
- The key parts to ensuring positioning is correct to allow for safest greeding are: Shiva is on a cardinal line; Shiva is roughly halfway between the middle and the edge; and you are on the same cardinal line as Shiva.
- Minor positioning points to make the strat safer are: don’t be too close to the middle of the arena for the second gaze and don’t be too close to the edge during the gaze if Shiva casts Holy in the middle.
Minor writeup notes:
- The guide says “face south” etc. but it entirely depends on how the mirrors spawn and how your group decides to pull Shiva (e.g. always either north or east). These things should be described relative to Shiva or the mirrors.
- I think the “If edge Holy” and “If center Holy” descriptions are reversed. Depends how you name them I guess.
Wyrm’s Lament + Ahk Morn / Morn Afah’s
How to properly heal this will change depending on your group’s mitigation plan and which mechanics your tanks are going to invuln. Fully optimized will change things, and speed groups make skip later hits entirely, further changing the optimal CD and heal uses so I’m hesitant to say “this is the best way.”
To help though, here’s a clip of how I handled the healing on our first clear: https://clips.twitch.tv/FaithfulAdorableTermiteNerfBlueBlaster
However, one note to make is that for the placement most groups use markers,