


Unlocking & Preparation
Quest: Starts at Troubled Gentleman
After meeting the following requirements, players must speak with the troubled gentleman in Gangos (X:6.6 Y:5.0) to unlock this duty.
- Completion of the quest “Fit for a Queen” (Normal)
- Resistance rank of 15 or higher
- Amassed at least 700,000 mettle
All effects are the same as Normal, with additional affixes:
- Players cannot be resurrected except with Healer LB3 and Lost Sacrifice.
- If you are not revived within a certain period of time, you will be forcibly removed from the party and kicked from the instance.
THIS IS VERY HARD. EXPECT TO BE 0 METTLE AT THE END OF PROGRESSION WHEN YOU CLEAR.
Logistics
Recommended Loadouts and Actions
It is required to use Pure Essences as well as having utility Lost Actions holstered. Additionally, everyone should have Reraisers active at all times if possible, as well as tanks having Lost Sacrifices holstered.
Role Actions:
- Tanks: Pure Essence of the Indomitable, Lost Aethershield, Banner of Noble Ends/Honored Sacrifice, Lost Sacrifice
- Healers: Pure Essence of the Divine, Lost Arise, Lost Seraph Strike, Banner of Solemn Clarity
- Melee: Pure Essence of the Duelist, Banner of Honored Sacrifice, Lost Font of Power, Lost Rend Armor (two per raid group)
- Ranged: Pure Essence of the Fiendhunter, Lost Dervish, Banner of Noble Ends, Lost Font of Power, Lost Cure II
- Caster: Pure Essence of the Elder, Lost Flare Star (one per raid group), Lost Cure IV, Lost Font of Magic (if there are two casters in party), Banner of Noble Ends
General Actions
- Many Lost Shells
- Many Lost Perceptions
- Many Lost Dispels and Lost Reflects
- A few Lost Protects
- A few Lost Steelstings and Lost Spellforges
- Lost Aethershield is required for damage mitigation for the last few bosses, and very helpful for the first few bosses
- Resistance Reraisers should be used by everyone at all times
- After every death, make sure you refresh your Resistance Reraiser
- Lost Banish III is extremely valuable for one mini-boss
- High damage is required – use actions to accelerate your DPS
- Lost Paralyze III is highly recommended at the beginning
The detailed list of actions needed to be used will be shown for each boss.
Pure Essence Interactions
All Pure Essences have unique interactions with certain Lost Actions.
- Pure Essence of Divine allows a low chance for Lost Arise to bypass the raise restriction in Delubrum Reginae Savage. All healers should have multiple holstered.
- Pure Essence of the Indomitable gives a low chance for Lost Sacrifice to not inflict Doom. This is not as important because of Lost Arise, but it may be useful.
- Pure Essence of the Duelist buffs the Banner of Honored Sacrifice to not inflict HP drain, and doubles its duration. All melee should be running this and this is what allows melee DPS to be strong DPS throughout the encounters.
- Pure Essence of the Fiendhunter gives Lost Cure II an additional MP regen effect.
- Pure Essence of the Elder gives Lost Cure IV an additional Lost Bravery effect on the entire party. This lasts for a minute and increases damage dealt by 10%. This is extremely important for DPS.
Recommended Party Compositions
You should have at least one role per party, with two tanks, two healers, and one of each DPS role at least highly recommended. Haste gear throughout the party on DPS and tanks helps with the DPS checks.
- For Tanks, Warriors are highly recommended for their high damage, self sustain, and low-cooldown invulnerability. Paladins, Gunbreakers, and Dark Knights all work as well.
- Any healers are fine.
- One caster in the raid should be assigned to use Lost Flare Star. The rest should be using Lost Cure IV every minute to apply Lost Bravery to the party.
- Two melees in the raid should be assigned to use Lost Rend Armor. As it lasts for 30 seconds and has a 60s CD, two players can keep 100% uptime.
- For pure DPS, Samurai, Machinist, Black Mage, and Monk are extremely strong. Dancer is strong if paired with any of those classes. Other classes are also fine for their utility – Warden’s Paean is extremely useful and Trick Attack gives enormous amounts of damage amplification. Casters can use Lost Cure IV for AoE Lost Bravery as mentioned previously.
Delubrum Interactions
There are certain interactions and limitations with the game engine that are rarely applied to smaller-scale content, but appear in Delubrum Reginae (Savage).
- There is both a debuff and buff limit, likely to be around 64. Any buffs and debuffs past this limit will not apply – the boss will either dodge the debuff or the player will dodge the buff. The most common occurrence of this will be the duel player with extra buffs or WARs popping defensive buffs. Clicking off less important buffs can remedy this issue, and it is unlikely to hit the debuff limit nowadays with the removal of many DoTs.
- Due to the problematic nature of effect culling – aka not being able to see ground effects because there are too many players – certain mechanics are shown to the player only, client-side. This is primarily seen with the Reversal of Forces debuff, which will only show your tether if you have one.
Pre-raid Logistics
Split the raid into six parties – A, B, C, D, E, F. These will be split into two groups: ABC and DEF. ABC takes the left side and DEF takes the right side at the start.
Getting hit by most mechanics will inflict you with Thrice-come Ruin, which will inflict an uncleansable Doom on you if you get three stacks. This will also decrease your damage dealt. The final two bosses will instead inflict Twice-come Ruin, which is the same debuff but inflicts Doom at two stacks. Make sure to play safe.
Because the amount of raises are limited, it may be prudent to save Healer LB3 for when the boss is about to die so that the raid can save Lost Arises for progression, whether it be raising in combat or raising after the second last boss as it does not give LB3. This may not be viable in prog, so listen to the raid leader’s calls.
Before starting, make sure to equip two fresh Lost Actions and pop an Essence before going to the Slimes/Golems platforms. This will allow you to carry more actions when progressing further into the raid. While progging Slimes/Golems this is not necessary, but is highly recommended for progging Trinity Seeker and beyond.
Traps
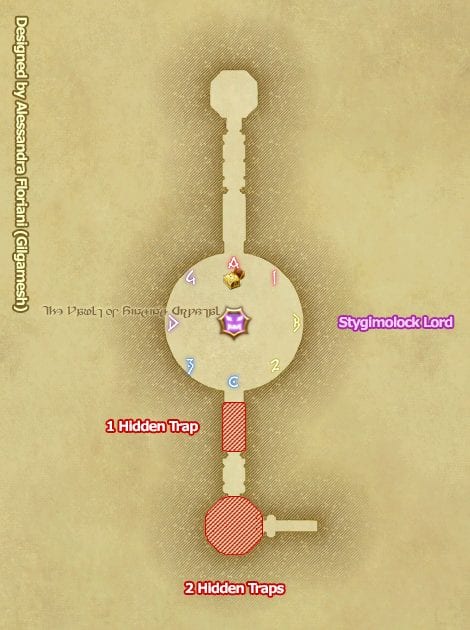
Just like in normal mode, hidden traps are placed in the raid. If players step into a trap, they will explode in an AoE slightly larger than the trap radius. These can be revealed with Lost Perception, and there are different types:
- Explosion traps are marked with a yellow explosion. These will deal massive damage.
- Poison traps are marked with a purple poison mark. These will inflict a poison.
- Mini traps are marked with a pink person. These will inflict players with Mini.
The Barracks and Granary
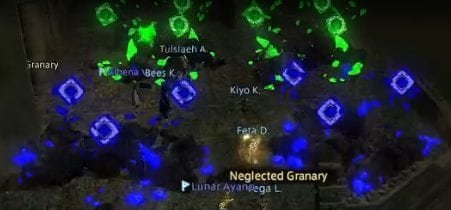
This mini-trash encounter is split into two sides. Players have to avoid traps while killing adds on platforms and dealing with respawning trash. When the door is interacted on either side, the pull will begin. Make sure all 48 players are ready before pulling. Both sides have three traps in total – two in rooms and one in the hallway. Therefore, it is necessary that players with Lost Perception scout the rooms and the hallway first before going in. Assign two players with Lost Perception on either side to take the two sides.
Required Lost Actions
- Lost Perception
- Lost Paralyze III (comes highly recommended, but not necessary)
- Resistance Medkit (can be popped beforehand, only two tanks need)
The Barracks – Slime Side
Timestamp: Xeno
While there is probably another intended way to do this side, Mika discovered a cheese strat which is effective for clearing. All other groups have been using this strat since it was shown. Therefore, I will explain the cheese strat down here. It is recommended to have the Slime side start earlier than the Golem side, but it isn’t a big deal in the end.
In the Barracks, players have to combine Viscuous Clots (Green Slimes) into a large slime and kill them on the platforms in each room. The Slimes cast Fusion which will merge slimes together – this can be silenced. Only Green Slimes should be allowed to merge with each other. In addition, Sanguine Clots (Red Slimes) will spawn inside the rooms – these must not be allowed to be merged. Red Slimes will tether to the first person that hits them, while Green Slimes have an aggro table. Unlike the Golem side, each group has the same responsibility.
The Slimes will spawn with a splash animation on the ground. The Green Slimes spawn inside the hallway and the Red Slimes spawn inside the rooms. Split each of your parties into a light party and claim a room.

All adds here will auto and have different mechanics.
- Green Slimes cast Fusion and auto the tank. Fusion can be interrupted, but you need it to go off for Green Slimes to absorb each other. When they do, they heal to full health and gain a stacking Damage Up and Maximum HP buff. These should be pulled by the healer standing in the doorway of each room, then pulled by the tank on the platform. When the Slime reaches five stacks, it will explode in an AoE called Rupture, which lights up the platform if the Slime explodes on it. As there are three Green Slimes per spawn and four rooms, players will have to hold on feeding.
- Red Slimes cast Fusion and tether to the first person who attacks them. Fusion should be interrupted, as Red Slimes absorbing each other is lethal. These should either be pulled by ranged to the platforms in the hallway and AoEd down or pulled by melee to the corner of the room and bursted down.
- Bozjan Soldiers will spawn intermittently at the platforms in the hallway. These must be aggroed by tanks and do a big unmarked AoE called Hellish Slash cast which must be stunned or paralyzed.
When the pull begins, the Perception players will move first and clear the hallway (one trap in the left, middle, or right) and each room (two traps total, in front or behind the platform). After each room is cleared, the tanks can move to their rooms. Split into light parties and perform your duties.
- The tank must pull the Green Slimes from the healer and allow them to fuse until the slimes reach five stacks.
- The healer must grab initial aggro on the Green Slime that spawns in the hallway and pull it to their room.
- The DPS must pull all the Red Slimes that spawn inside the rooms into the hallway near where the Bozjan Soldiers spawn, or to the outer edge of the room.
- All other players should be DPSing the Bozjan Soldiers along with the Red Slimes.
When the Green Slime reaches 5 stacks, it will do a long cast called Rupture. This explodes the Slime and does a massive lethal AoE that can be outranged. All the Green Slimes must be exploded at relatively the same time, or else you will fail as not all the platforms will be lit up at the same time. It is necessary that players communicate how many stacks their Green Slime has, and whether to hold or not in feeding Green Slimes at a certain point.
When the go signal is called, all tanks should let their Green Slimes fuse and start casting Rupture on the platform. All players should then run away to the far safe spot indicated by the pin. Make sure to silence Fusion and kill adds on the way as to not let anybody die.
After both groups have lit up all platforms, players will be allowed to continue to the first boss, Trinity Seeker!
The Granary – Golem Side
In the Granary, players have to kill four different coloured golems on four different coloured platforms. The Golems cast Metamorphose which changes their colour, restores them to full HP, and can be silenced. As the Golems start with two Blue and two Green, you must let two go off and silence two at the beginning to have the four colours required. Golems will transform from Blue > White > Green > Red > Blue. If the Golems are too close to each other, they will tether and take zero damage. However, it seems aggro still applies properly, as to let the tanks take them into the rooms.
These Golems start as rubble outside of the room. When the pull is triggered (either door is interacted with), they will spawn. Split your tanks as follows, and make sure each tank except the red one has one or two healers covering them at all times. The red tank will need healing at the beginning.

All Golems have 5.3m HP and auto the tank. They each have a special mechanic, and gain a damage up stack when another golem dies. Golems will continuously respawn unless killed on the platform – if they are killed successfully, the platform will glow.
- The Blue Golem has the Torrential Ruin buff. This Golem will cast an AoE on the current MT which does high damage and inflicts a heavy bleed. This bleed must be dispelled using a Resistance Medkit or Esunad. I recommend simply invulning the tank buster and having healers Esuna AND heal the tank after the bleed is gone.
- The White Golem has the Subtle Ruin buff. This Golem will cast Compaction at or below 30% HP, which cannot be interrupted. This will heal the Golem to full if the cast is allowed to go off. This is a DPS check, and all players should focus this Golem and save burst when pushed. If the Golem casts Metamorphose right before, it will not cast Compaction for a while, so pushing then is the best idea. The White Golem starts as a Blue Golem, so its first Metamorphose cast must not be interrupted.
- The Green Golem has the Avaricious Ruin buff. This Golem will consume the Ruins Golems that spawn outside the rooms, becoming stronger and healing to full. Simply tank this golem inside the room as to not let it consume other Golems.
- The Red Golem has the Bloody Ruin buff. This Golem tethers to the first player who hits it, and will slowly walk towards them. If it is allowed to autoattack, it will deal massive damage. The tank should kite this golem around the room, and when it is about to die (sub 20%), invuln and keep it on the platform to ensure it dies on there. The Red Golem starts as a Green Golem, so its first Metamorphose cast must not be interrupted.
- At the same time, Ruins Golems will spawn on the platforms in the hallway. These autoattack for low damage and will tether to the first player that attacks them. These should be simply kept on the platforms by two tanks and killed in between coloured Golems. No one else should hit them when they spawn, as dragging one into the Green Golem room means certain death.
When the pull begins, each tank should pick up their respective Golem add. No other players should be hitting them at this point. The Perception players will move first and clear the hallway (one trap in the left, middle, or right), and each room (two traps total, in front or behind the platform). After each room is cleared, the tanks can move to their rooms. The Blue and Green Golems in the Blue and Green rooms must be interrupted at the first Metamorphose cast, while the Blue and Green Golems in the White and Red rooms must be allowed to cast it. The other tanks should pick up the Ruins Golems, and use Lost Paralyze III on them to lower damage.
The recommended kill order is Blue > Green > White > Red. This is because if the Blue tank buster is allowed to go off twice, the tank will have to use an extra Medkit/invuln, which takes much more space. Green is killed second as it does more damage than White, and also allows the group’s cooldowns to come up to burst the White golem. Red is killed last, as that tank takes no damage anyways and they can kite the entire time (authentic M+ tanking experience).
After the coloured Golems die, players must wait for the other side to finish. This is considered the soft enrage – Ruins Golems will spawn at an accelerated pace and start casting Demolish, a long channeled cast which hits all players, deals moderate damage, and inflicts one stack of Thrice-come Ruin. This must not be allowed to go off – Repose, Lost Paralyze III, and stuns are required.
After both groups have lit up all platforms, players will be allowed to continue to the first boss, Trinity Seeker! Remember to pick up your chests.
Loot
Two chests are lootable before Trinity Seeker. These include one random Pure Fragment each.
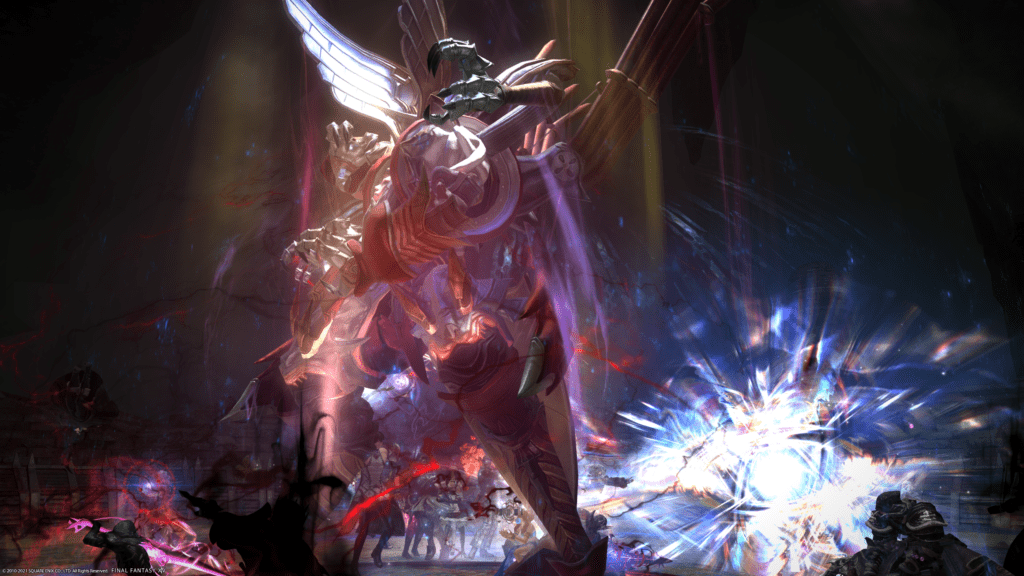
Trinity Seeker

Required Lost Actions
- No Lost Actions are required for this boss, but big pumper damage is required. Use high damage and mitigation Lost Actions.
Mechanics
The arena has a number of barricades at the intercardinals, which is required to hide behind OR get knocked into to avoid getting knocked into the death wall. In addition, there are rings around the arena – one is yellow (sand), and the other is green (stone). These will be required to stand on for certain mechanics. Have markers placed in the arena ABCD NESW and 1234 at intercardinals.
There are three “phases” to the fight, which are indicated by the buff the Trinity Seeker currently has: Merciful Air, Baleful Air, and Iron Air.
The Trinity Seeker jumps to the middle of the arena, faces south, and spawns a number of clones that cast mechanics for it. The mechanic is always scripted in order.
High damage raidwide AoE.
Players are tethered to each other – run away from each other to break the chain.
A mechanic based on what buff the Trinity Seeker receives. The mechanic itself has no castbar, so be prepared to move beforehand.
- Merciful Air is indicated by blue blades. The Trinity Seeker will cast a + shaped AoE, Act of Mercy.
- Baleful Air is indicated by dark blades. The Trinity Seeker will cleave the sides of the arena with Baleful Swathe, leaving a line under it safe.
- Iron Air is indicated by green blades. The Trinity Seeker will cast a line stack at the party, Iron Impact.
Merciful Air
The Trinity Seeker’s four blades will glow in an order, indicated by First Mercy, Second Mercy, Third Mercy, and Fourth Mercy. Upon the cast of Fourfold Mercy, the boss will cleave the side of the arena that was lit up in sequential order. Move fast in order to dodge them.
The Trinity Seeker will summon white line AoEs across the arena, as well as an Aetherial Orb at one of the intercardinals. Players must dodge line AoEs while looking away from the Aetherial Orb, as it casts Merciful Moon, a petrifaction ability. In addition, a giant circle flower AoE will spawn at another intercardinal, so players must move to the safe spot.
A physical tank buster cleave on the current MT.
Baleful Air
Makes the Trinity Seeker’s swords glow, and changes the effect of Baleful Blade and Baleful Onslaught.
If Phantom Edge was cast beforehand (the swords are glowing), it will be a knockback – get knocked into a barrier. If there was no Phantom Edge cast (the swords are not glowing), it will be a room AoE – get behind a barrier.
If Phantom Edge was cast beforehand (the swords are glowing), only one player can stand in front, as the sword will pass through one player and kill any other players. If there was no Phantom Edge cast (the swords are not glowing), it is a shared tankbuster with two tanks.
This is a Manifest Avatar mechanic. Four clones will appear in an AoE at the sides of the arena, then charge down the arena. Move to an edge, and move along the side to dodge the charge.
Iron Air
The Trinity Seeker will jump to a ring, and glow – that ring will explode at the end of the castbar. Be on the opposite ring.
This is a Manifest Avatar mechanic. Three players will get an Earthshaker marker from the centre – run away and do not hit the party or each other. It gives a damage received up debuff, so players cannot be hit by more than one.
This is a Manifest Avatar mechanic. Three clones will appear and fire line AoEs at random players.
While these mechanics seem simple, Manifest Avatar is the main difference between Normal and Savage mode – the boss will execute multiple mechanics using the clones in order, and players will have to perform them quickly.
Verdant Tempest
Manifest Avatar
First Mercy
Second Mercy
Third Mercy
Fourth Mercy
Fourfold Mercy
Seasons of Mercy
Verdant Tempest
Merciful Arc
(@ 80% OR after Merciful Arc)
Verdant Path – Baleful Swathe
Baleful Onslaught
Phantom Edge
Baleful Onslaught
[Phantom Edge] (may or may not occur)
Burning Chains
Baleful Blade
Manifest Avatar
[Phantom Edge] (may or may not occur)
Baleful Firestorm
Baleful Blade
Verdant Tempest
Verdant Path – Iron Impact
Manifest Avatar
Iron Rose
Iron Splitter
Manifest Avatar
Iron Splitter + Dead Iron
Iron Splitter + Dead Iron
Iron Rose
Verdant Tempest
Verdant Path – Act of Mercy
Manifest Avatar
Baleful Firestorm
First Mercy
Second Mercy
Third Mercy
Fourth Mercy
Fourfold Mercy
Seasons of Mercy
Burning Chains
Verdant Tempest
Merciful Air
Manifest Avatar
First Mercy
Second Mercy
Third Mercy
Fourth Mercy + Iron Splitter
Fourfold Mercy + Iron Splitter
Seasons of Mercy + Iron Splitter + Iron Rose
Verdant Tempest
Verdant Path – Baleful Swathe
Manifest Avatar
[Phantom Edge] (may or may not occur)
First Mercy
Second Mercy
Third Mercy + Baleful Blade
Fourth Mercy
Fourfold Blade
Burning Chains
Verdant Tempest
Manifest Avatar
[Phantom Edge] (may or may not occur)
Iron Splitter
Baleful Blade
Manifest Avatar
First Mercy
Second Mercy + Burning Chains
Third Mercy
Fourth Mercy
[Phantom Edge] (may or may not occur)
Fourfold Mercy
Baleful Blade
[Phantom Edge] (may or may not occur)
Baleful Onslaught
Verdant Path – Act of Mercy
Enrage is at 9:15 – a short casted Verdant Tempest that instantly wipes the group.
Strategy
You will generally be able to do this fight with one raid leader calling out all mechanics – there is little personal responsibility, apart from Dead Iron.
- Pre-mitigate the first Verdant Tempest. It is highly recommended for a tank to always use Lost Aethershield on this AoE.
- Make sure you know who is MTing. They should attempt to always face the boss north. Every other tank should have tank stance off at all times, unless the MT dies.
- One player should call out the numbers which are safe as they appear, then repeat them at the end. Dodge the four cleaves, then look away from one of the intercardinals, which will have the orb on it. Dodge the line AoEs while doing so, and move away from the flower.
- Alternatively, the call can be left or right of the boss, but this poses problems with orientation. Make sure to have clear calls, no matter what the strat is.
- Mitigate and heal up for Verdant Tempest.
- Attempt to move the boss back to the middle, and mitigate the tank buster. If the boss reaches <80% before this, be prepared for the Verdant Path.
- Stand front or behind for Verdant Path – Baleful Swathe.
- At least one tank should go and stand with the MT to soak the tank buster. To be safe, multiple tanks should go.
- The MT should then stand still at the beginning of the castbar of the second Baleful Onslaught to dodge the buster.
- Break the chains. If the boss casts Phantom Edge, get knocked back into a barrier, otherwise hide behind a barrier.
- Come back to the middle to not get clipped by a Baleful Firestorm AoE. Go to the intercard or cardinal before the first dash, then move. You will either have to move behind or in front of a barrier, depending on if the boss cast Phantom Edge or not.
- Mitigate and heal Verdant Tempest. Face the boss north.
- Everyone else should stack south for Verdant Path – Iron Impact.
- Dodge the line AoEs, then do the first Iron Splitter mechanic. Stand on the opposite type of tile the boss is standing on.
- For the second Iron Splitter mechanic, the marked players need to run out while not clipping each other. Again, stand on the opposite type of tile.
- For the third Iron Splitter mechanics, the marked players also need to run out while not clipping each other. Generally if the boss jumps far they can simply stay out. Again, stand on the opposite type of tile. Dodge line AoEs right after.
- Mitigate and heal Verdant Tempest. Face the boss north and drag it to the middle.
- Get to the intercards to dodge the + shaped AoE.
- For the first Manifest Avatar mechanic of the phase, players need to dodge the Baleful Firestorm while looking at the safe spots of the cleave. One player should call out the numbers which are safe as they appear, then repeat them at the end. Look away from the orb, and dodge the flower AoE.
- Run away from your chained partner if you have one.
- Heal and mitigate Verdant Tempest as well as Merciful Air.
- For the second Manifest Avatar of the phase, players will need to dodge the Fourfold Mercy while doing thre Iron Splitters. Again, there is a Seasons of Mercy after the Fourfold Mercy, so look away from the orb, dodge the line AoEs, and move away from the flower. There are additional Iron Rose AoEs – move into the white line AoEs after they go off to dodge the Iron Rose AoEs.
- Heal and mitigate Verdant Tempest.
- Get in front or behind the boss to dodge Baleful Swathe.
- For the first Manifest Avatar mechanic of the phase, players need to dodge Fourfold Mercy coming from the Seeker clone that jumps to a random cardinal. They will also need to either get knocked back into a barrier or hide behind a barrier.
- For these safe spots, have the shotcaller call the cleaves relative to the markers where the clone is facing. So if the clone is S and facing N, 1 would NW, 2 would be NE, 3 would be SE, and 4 would be SW.
- Afterwards, break the Burning Chains.
- Heal and mitigate Verdant Tempest.
- For the second Manifest Avatar mechanic of the phase, players need to stand on the correct Iron Splitter ring, and immediately afterwards get knocked back into a barrier or hide behind a barrier.
- For the third Manifest Avatar mechanic of the phase, players need to dodge Fourfold Mercy coming from the seeker clone that jumps to a random cardinal. They will also need to either get knocked back into a barrier or hide behind a barrier afterwards.
- After is a shared tank buster or stillness cleave.
- DPS the boss until enrage.
Loot
One chest is lootable after Trinity Seeker. This will drop one Runner’s Plating (Foot Gear) with a small chance to drop an Orderly Runner’s Secrets (Foot Gear).
Post Trinity Seeker
After Trinity Seeker, pick up your chest, which contains a Foot token with a chance at a full upgrade piece. Do not move into the next room until players with Lost Perception have revealed them – there are three traps.
There are two paths – the first path going north leads to a solo encounter against the Stygimoloch Warrior, explained below. The second path goes east towards the next mini-boss and has three more traps. This is where the party should go – do not go up the stairs until the player with Lost Perception reveals them. There are three traps before the hallway to the boss.

Dahu
Timestamp: Xeno
Dahu is fought in the Hall of the Supplicant and is the second boss in Delubrum Reginae. This is a mini-boss, and as such is not as long and players will not be able to receive LB3. Place markers the same way as Trinity Seeker – ABCD at cardinals, 1234 at intercardinals.
Required Lost Actions
- No Lost Actions are required for this boss.
Mechanics
Reverberating Roar
Three AoEs appear under random players. This happens three times. There is no castbar for this mechanic.
Hot Charge
The boss charges in the direction it is facing.
Firebreathe
The boss will turn to a random player or directly across the arena, and do a conal AoE. This is sometimes accompanied with a rotating marker, meaning the boss will rotate x times and Firebreathe.
Head Down
The adds on the outside will charge, doing a line AoE.
Left-Sided Shockwave / Right-Sided Shockwave
The boss cleaves one side, and then immediately cleaves the other side. Move through after the first cleave. This can be outranged.
Feral Howl
The boss knocks all players back and staggers them, rendering them unable to perform actions for a few seconds.
Hunter’s Claw
The adds on the outside will do a circle AoE around them.
Spit Flame
The boss marks players from 1 to 4 and spits a fireball at them, dealing moderate damage, and killing any add caught in the blast. This allows for the raid to have a safe spot for Hunter’s Claw.
Burn
The boss marks two players with a proximity marker, which does higher damage the closer other players are.
Hysteric Assault
The boss knocks all players back and staggers them, rendering them unable to perform actions for a few seconds.
Crowned Marchosias
These adds appear and tether to the main tank, autoing them for damage. Three waves of two adds each will spawn.
Fight Mechanics
Reverberating Roar
Reverberating Roar
Hot Charge
Hot Charge
Firebreathe
Head Down
Spit Flame + Head Down
Head Down
Left-Sided Shockwave / Right-Sided Shockwave
Right-Sided Shockwave / Left-Sided Shockwave
Feral Howl + Hunter’s Claw
Firebreathe x5
Crowned Marchosias adds spawn
Reverberating Roar + Head Down
Left-Sided Shockwave / Right-Sided Shockwave + Head Down
Right-Sided Shockwave / Left-Sided Shockwave
Spit Flame + Head Down
Hysteric Assault + Burn x2
Firebreathe x5
Left-Sided Shockwave / Right-Sided Shockwave
Right-Sided Shockwave / Left-Sided Shockwave
Hot Charge
Firebreathe
Strategy
- Move and spread out to dodge Reverberating Roar.
- After the second one, look where the boss is facing. Dodge the dash, and look for the second dash. Get to the boss quickly to easily dodge the Firebreathe that comes right after.
- Bring the boss back to the middle, where it is safe from all the Head Down AoEs.
- Players need to look above their head for a marker. The player with 1 dot will go to the edge at the 1 marker, the player with 2 dots will go to the edge at the 2 marker, etc. Make sure you are standing on an add to kill it.
- Dodge into the Shockwave cleave or outrange it.
- Get knocked back to a safe spot. If you time it correctly, you are able to dash back in before you are stunned.
- Quickly sprint back to the boss to dodge Firebreathe. Rotate in the direction indicated to dodge the next four.
- Kill the adds and watch the MT’s health. They should mitigate this.
- Ranged should move out so AoEs do not crowd the middle. Dodge into the Shockwave or outrange it.
- Again, look for markers above your head. Go to the edge to kill the add with your AoE at the designated spot if you have one.
- The players marked with the proximity marker should get knocked back south to separate safe spots. All other players should get knocked back north.
- Dodge Firebreathe.
- The rest of the mechanics are simple. Kill the boss.
Loot
One chest is lootable after Dahu. This will drop two random Pure Fragments.
Stygimoloch Warrior
The Stygimoloch Warrior is a 1v1 duel that rewards the player with the Pride of the Lioness buff. This grants them double damage, increased maximum HP, and 10k defense and magic resistance. One skilled player on a melee DPS class should complete this in order to grant the party an additional chest as well as increase the amount of raid damage in the next few bosses. If Dahu is defeated before the boss is pulled, it will disappear and the player will be stuck there. There is one trap before the encounter room that should be cleared with Lost Perception, as well as one after.
Required Lost Actions
- Lost Perception is required to view traps before and during the encounter.
- Lost Dispel is required to dispel a damage buff the boss gives.
- Damage Lost Actions are highly recommended to beat the DPS check.
Mechanics
Surge of Vigor
Grants the Stygimoloch Warrior a Damage Up buff. This must be dispelled.
Unrelenting Charge
Charges at the player three times, knocking them back slightly each hit. Pop a knockback prevention to avoid being knocked into the wall.
Entrapment
The boss jumps north, places many hidden traps throughout the arena, and knocks the player back. The player should be at the north edge to avoid getting knocked into the death wall. This is immediately followed by Lethal Blow.
Lethal Blow
The boss cleaves the entire room except behind it.
Vicious Swipe
A circular AoE around the boss. This is immediately followed by Crazed Rampage.
Crazed Rampage
The boss knocks the player back and does damage.
Focused Tremor
There will be square AoEs in the arena. These will explode in the order they appear.
Focused Slash
The boss jumps to a corner and cleaves the entire room except behind it. Dodge into the exploding AoE, and then into the safe spot of Focused Slash.
Inescapable Entrapment
The boss jumps to the middle and places traps all across the arena except in a small + shape in the centre. The explosion traps will explode after the mechanic set is done.
Withering Curse
At the end of this cast bar, the player needs to be Mini from the mini trap in order to avoid being killed.
Devour
The boss does a conal AoE in front of him, devouring anyone caught in it.
Falling Strike
The boss tethers the player, and when the castbar starts, places a cleave where they were and rotates this cleave. The player needs to bait the AoE to the opposite side of the safe spot, and dodge into the safe spot of Focused Tremor and keep rotating.
Surging Flames
At the end of this cast bar, the player needs to take Deep Freeze from the ice trap in order to avoid being killed.
Surging Flood
At the end of this cast bar, the player needs to become a Toad from the Toad trap in order to avoid being killed.
Leaping Spark
The player takes three instances of Lightning damage.
Coerce
This will give the player a mindjack debuff – when the debuff resolves, they will be forced to move in that direction.
Fight Mechanics
Surge of Vigor
Unrelenting Charge
Entrapment
Lethal Blow
Vicious Swipe
Crazed Rampage
Focused Tremor
Focused Slash
Inescapable Entrapment
Withering Curse -> Devour OR Surging Flames
Surge of Vigor
Focused Tremor
Falling Slash
Vicious Swipe
Crazed Rampage
Inescapable Entrapment
Surging Flames OR Withering Curse -> Devour
Surging Flood
Leaping Spark
Coerce
Surge of Vigor
Focused Tremor
Focused Slash
Surge of Vigor
Unrelenting Charge
Vicious Swipe
Crazed Rampage
Sun’s Ire (enrage)
Strategy
Dispel and Perception are required until the last Surge of Vigor cast. Afterwards, the player can switch to a DPS action if extra damage is needed.
- First, Dispel the Surge of Vigor.
- Pop a knockback prevention for Unrelenting Charge.
- Get knocked back, and find a safe path through the minefield with Lost Perception.
- Dodge Vicious Swipe towards the centre of the map, and run back in to avoid being knocked back into the wall by Crazed Rampage.
- Dodge Focused Tremor before moving to the safe spot for Focused Slash.
- Get into the middle for the first Inescapable Entrapment. Use Lost Perception to find the traps that you need, and use it while avoiding the other traps to dodge the mechanic. If Withering Curse is cast, you need Mini. If Surging Flames is cast, you need Deep Freeze. If Surging Flood is cast, you need Toad. Keep in mind the mine traps explode afterwards. Avoid the explosions, as well as the front of the boss.
- Dispel Surge of Vigor.
- Bait the Falling Slash to the opposite of the first exploding Focused Tremor square, then rotate. Move into the safe square each time it explodes, and keep going to dodge the slashes.
- Dodge the Focused Swipe into the edge where the outside AoEs have exploded, and move back in for Crazed Rampage to avoid being knocked into the wall.
- Again, get into the middle for Inescapable Entrapment. Find the traps you need while avoiding the mine traps. After the first trap, you will need to take the toad trap early to avoid dying to Leapin Spark.
- Mitigate Leaping Spark.
- For the next set of mechanics, you need to get Coerced into a safe square for Focused Tremor, and then move into the safe spot for Focused Slash.
- Dispel Surge of Vigor and keep the boss where it is.
- Use a knockback prevention for Unrelenting Charge. Move out for Vicious Swipe, and back in for Crazed Rampage.
- DPS the boss until enrage to beat the DPS check.
After beating the boss, interact with the Lioness Statue to gain the Pride of the Lioness buff. There is ONE MORE trap near the teleport area, so continue using Lost Perception to reveal traps.
Loot
One chest is lootable after the Stygimoloch Warrior. This will drop two random Pure Fragments.
Post-Dahu
There are no traps on the way to the Hall of Hieromancy. The door will not open unless the player facing the Stygimoloch Warrior wins or is defeated.

The Queen’s Guards
Timestamp: Xeno
The Queen’s Guards are fought in the Hall of Hieromancy and is the third boss in Delubrum Reginae.
Required Lost Actions
- Lost Spellforge and Lost Steelsting are required to do damage to the bosses.
- Lost Dispel is required to dispel a damage buff the boss grants itself.
- Lost Reflect is required for the final phase.
- Damage Lost Actions are highly recommended to beat the DPS check.
Mechanics
Moderate raidwide magical damage.
Tank buster that deals heavy physical damage.
Signals the start of a set of mechanics.
The Knight and Warrior will tether together with a purple or yellow tether. This indicates the type of buff they will get:
- If the tether is purple, they will gain a magical vulnerability down buff. You need to do physical damage – casters and healers need Lost Steelsting applied.
- If the tether is yellow, they will gain a physical vulnerability down buff. You need to do magical damage – melee, ranged, and tanks need Lost Spellforge applied.
Queen's Knight
The Queen’s Knight uses its shield or sword, dictating what mechanics will occur next.
The Queen’s Knight becomes untargetable and summons an Aetherial Sphere in the centre of the arena. It will charge the orb in a divebomb, explode it, and do a mechanic based on its weapon:
- Sword Omen: dives through the middle, exploding the orb in the middle. Players need to get to the very edges of the arena.
- Shield Omen: knocks back the orb and all players from the centre. Players need to get knocked back to a safe spot away from where the orb gets pushed to.
The Queen’s Knight does a mechanic based on its weapon and cleaves three quadrants of the arena. Get to the safe quadrant and do the weapon mechanic:
- Sword Omen: large AoE
- Shield Omen: donut AoE
Queen's Warrior
Summons bombs around the arena. The big ones will drop and explode first, then the small ones.
The Queen’s Warrior will tether players and/or bombs. Tethers on players are localized on player’s screens. Tethered objects will have reversed gravity when Above Board occurs. This means that tethered small bombs will drop first, and tethered players will also drop first.
Floats all bombs and players above the board, and then drops them in order of heaviest then lightest. Big bombs and heavy, small bombs are light, and players are light normally.
The Queen’s Warrior grants itself a damage buff that must be dispelled.
Four AoEs appear around the arena – two wind and two lightning. Players who are not tethered must go to the lightning AoE, and players who are tethered must go to the wind AoE.
Queen's Gunner
Summons turrets at the outside of the arena, which fire in. They are staggered on each side. In the later phase, these turrets are summoned inside the arena, but do not fire themselves.
Inflicts players with an Unseen debuff. They will have three sides closed and one side open.
Deals damage to all players. Players need to face their open side to the boss, then to the turrets on the outside that fire.
Summons a Gun Turret at the east and west sides of the room. This add will cast Explosion after a while, enraging and wiping the raid if not killed in time.
Grants the Gun Turrets a damage buff. This should be dispelled.
The Gun Turrets fire a lethal shot at whoever is tanking them. This needs to be invulned.
The boss fires a line AoE at turrets in the arena. These will fire a line AoE in the direction they are facing if they are hit by a line AoE.
Queen's Soldier
Summons balls of flame of two different sizes. They will explode after a while, with the AoE size based on the size of the flame.
Transforms the balls of fire into frogs.
For Icy Portent, players must be moving when it is cast. For Fiery Portent, players must be standing still when it is cast.
Summons Soldier Avatars that jump around the map.
Tethers to two Soldier Avatars. These will do a real AoE after they finish jumping around. The non-tethered Avatars do a fake AoE.
Sphere Phase
The Aetherial Wards parry all attacks from two directions. Players need to attack from the direction without shields.
Two of these spawn north and south in the arena. These Spheres will cast Spite Smite on the player currently tanking the orb. This deals lethal damage and should be invulned.
Twelve of these spawn around the arena. These Spheres will cast Fracture, a circle AoE that must be Reflected to kill the orb. If they are not killed, they will Burst, dealing raidwide damage and inflicting a Damage Down debuff.
All four bosses are targetable at the beginning. Players can walk up to them without pulling. Adds will jump away when they reach 80%, at which point they become untargetable. When all adds reach 80%, it will transition to the next phase.
Queen’s Shot + Blood and Bone
Blood and Bone + Blood and Bone
(Repeat?)
When either boss is killed, the other will start its enrage cast, so they must be killed at roughly the same time. When both sets are killed, it will transition to the next phase.
Spellforge OR Steelsting
Relentless Battery
Shield Omen OR Sword Omen
Bombslinger
Reversal of Forces
Optimal Offensive
Above Board
Boost
Blood and Bone + Blood and Bone
Relentless Battery
Reversal of Forces
Winds of Weight
Shield Omen OR Sword Omen
Optimal Play
Boost
Blood and Bone + Blood and Bone
Rapid Sever + Rapid Sever
Spellforge OR Steelsting
Relentless Battery
Sword Omen OR Shield Omen
Bombslinger
Reversal of Forces
Optimal Offensive
Above Board
Boost
Blood and Bone + Blood and Bone
Relentless Battery
Reversal of Forces
Winds of Weight
Sword Omen OR Shield Omen
Optimal Play
Boost
Blood and Bone + Blood and Bone
Rapid Sever + Rapid Sever
Blood and Bone (enrage)
Relentless Battery
Great Ball of Fire
Fool’s Gambit
Automatic Turret
Reading
Queen’s Shot
Shot in the Dark + Rapid Sever
Queen’s Shot + Blood and Bone
Relentless Battery
Gun Turret
Higher Power
Sniper Shot
Queen’s Shot + Blood and Bone
Icy Portent OR Fiery Portent
Relentless Battery
Double Gambit
Secrets Revealed + Automatic Turret
Reading
Queen’s Shot
Queen’s Shot + Blood and Bone
Shot in the Dark + Rapid Sever
Relentless Battery
Automatic Turret
Turret’s Tour
Icy Portent OR Fiery Portent
Queen’s Shot + Blood and Bone
Shot in the Dark + Rapid Sever
Queen’s Shot + Blood and Bone (enrage)
In Phase 3, the Queen’s Guard will jump to the intercardinals and protect themselves with the Aetherial Ward, which must be killed. They will start casting a 60s long enrage.
Spiritual Spheres + Aura Spheres
Coat of Arms
Coat of Arms
Spiritual Spheres + Aura Spheres
Coat of Arms
Coat of Arms
Strategy
Phase 1
- Pre-buff players with Steelsting and Spellforge.
- Begin by having one tank assigned to each add. These tanks will be tanking their respective add later on.
- Bring all the bosses together and cleave them down below 80%.
Knight and Warrior
- Pull the Warrior to the east edge of the arena and the Knight to around the middle. They tether if they are close together, so you don’t need to place them too close to each other.
- Be careful of aggro on these bosses. From here on out, the duelist will begin doing crazy amounts of damage and can pull aggro, as well as other players with tank stances.
- If your group pre-cast Steelsting and Spellforge on everyone, simply click off the buff you don’t need. Otherwise, apply the necessary buff.
- You are clicking off the same colour buff as the tether.
- Check whether the Knight casts Sword Omen or Shield Omen.
- If it is Sword Omen, players will have to go to the edge to dodge bombs.
- If it is Shield Omen, players will have to be knocked back into a bomb, away from where the orb will get knocked back to.
- Do not be in the path of the charging Knight.
- At Reversal of Forces, the raid leader should call out where tethers are going. If bombs are tethered, tethered players are going to big bombs. If bombs are not tethered, tethered players are going to small bombs.
- The tethered players need to move to an exploded bomb, or else the bomb they were on will drop and explode on them right after.
- The player assigned to Lost Dispel needs to dispel the Boost buff the Warrior casts. Backup players should attempt to get this as well if the Dispel player is down.
- Mitigate and heal the AoE.
- At Reversal of Forces, the raid leader should call out where tethers are going. Tethered players will go to the wind AoE, while non-tethered players will go to the lightning AoE.
- Check whether the Knight cast Shield Omen or Sword Omen. Either way, after the wind/lightning AoEs go off, head towards the Knight, who should be close to the centre of the arena.
- Look for the safe quadrant, and run far if it is Sword, or go close if it is Shield.
- Dispel player should dispel Boost immediately after.
- Mitigate and heal the AoE as well as the tank busters.
- Re-apply Spellforge and Steelsting and necessary.
- The rest of the mechanics in the phase are the same as the first two Relentless Batteries, except the Knight will do the opposite mechanic. Handle them correctly and pump damage to beat the enrage.
Gunner and Soldier
- Pull the Gunner to the middle of the arena and the Soldier to the west edge. Again, they tether, so safety is more important than being able to cleave damage.
- Check where the small balls of fire spawn. These will be turned into frogs, and will move around the arena. Where the small orbs frogs go, the edge will be the safe spot, as they will do an AoE and it will be smaller than the other two. Assign one or two players to check this and have the raid leader call it out.
- Players will receive an Unseen debuff, with one side open. When moving out to dodge the fire AoEs, they will have to face the open side to the Gunner in the middle, then the Automatic Turrets on the outside. Confine yourself to one lane to make sure you are not hit by multiple Turret’s Tours, and face the open side to the correct turret.
- Mitigate the tank buster and heal the AoE.
- Assign two tanks to pick up the Gun Turrets. The Gun Turrets will need to be dispelled after Higher Power is cast.
- All players should switch to the Gun Turret and kill them. You can cleave good damage onto them alongside the bosses.
- The two tanks need to invuln Sniper Shot.
- Afterwards, stand still if it is Fiery Portent and keep moving if it is Icy Portent.
- Check where the Soldier clones spawn. The players keeping track should note where the non-tethered clones jump to – those are the safe spots.
- Do the Reading + Automatic Turret mechanic the same as before – face the open side to Gunner when running to the safe spot, then be in a lane and face the open side to the Automatic Turrets.
- Heal the AoE and mitigate the tank buster.
- For the final Relentless Battery, move to a safe spot from all the line AoEs and perform the Portent mechanic.
- Heal the AoE, mitigate the tank buster, and pump damage before the enrage goes off.
Phase 3
- Parties ABC should go north and groups DEF should go south to DPS the Aetherial Sphere.
- Tanks need to pick up the Aura Sphere and invuln Spite Smite.
- Players assigned to Reflect in each party should stand at their respective Spiritual Sphere and pop Reflect before Fracture goes off. Stand in the AoE, then refresh Reflect and stand in the next Spiritual Sphere. The raid leader should have posted a diagram for Reflect spots for each party – simply follow this.
- When the Aura Sphere dies, go and DPS the Aetherial Wards. Make sure you attack from the correct side, and stop attacking when Coat of Arms is about to go off in order to move to the right side to attack to.
- Do the second set of Aura Spheres and Spiritual Spheres the same way as the first one. Two different tanks need to pick up the Aura Sphere and invuln Spite Smite, as the original tanks will not have their invulns up.
- Finish DPSing down the Aetherial Wards before the enrage goes off. Caster LBs and Melee LBs should be used, but these can be parried by Coat of Arms, so do them after they cast. If there are any players dead, use Healer LB3 instead to save Lost Arises and Lost Sacrifices.
There are no traps after this encounter, so pick up your chests and make your way to the Pride of the Lioness. If the duel was successful, you will get an extra chest – if not, you will only get one chest.
Loot
One chest is lootable after the Queen’s Guards, with one additional chest if the duel was successful. The normal chest rewards one Runner’s Plating (Head Gear) while the duel chest rewards one Runner’s Plating (Hand Gear). Both chests have a chance to drop the upgrade item whole.
Bozjan Phantom
Timestamp: Xeno
The Bozjan Phantom is fought in the Pride of the Lion and is the fourth boss in Delubrum Reginae. This is a mini-boss, and as such is not as long and players will not be able to receive LB3. Place markers north and south on the lines – ABCD north, and 1234 south.
Required Lost Actions
- Lost Banish is highly recommended, as it increases raid damage significantly. Only one player needs to bring it, and reapply it as needed.
Mechanics
The Bozjan Phantom will summon two rows four shapes on the north of the arena. These will be activated once the boss casts Manipulate Miasma. The glowing one will activate first, and then the non-glowing ones after. There are three different shapes:
- An orange donut circle indicates that there will a large donut AoE going down the arena north to south. The safe circle is indicated by a tiny circle on the lines, so players can easily find out where to move.
- A green circle indicates that circle AoEs will go down the arena north to south.
- A purple square indicates that a line AoE will pulse three times on that line.
Moderate raidwide magical damage.
The first time this is cast, the boss will enter an adds phase. The boss will start casting an enrage Malediction of Agony that can be silenced, but is untargetable until all three waves of adds are down. Bloody Wraiths must be killed, while Misty Wraiths must be healed to full.
- Wave 1: 2x Bloody Wraith, 1x Misty Wraith
- Wave 2: 2x Bloody Wraith, 2x Misty Wraith
- Wave 3: 3x Bloody Wraith, 3x Misty Wraith
The second time this is cast, the boss will summon a wraith north or south. This will knockback players almost the entire arena.
- If there are 2 lanes next to each other that have donut + circle, the knockback will be from south to north. Go to the one that is safe depending on Manipulate/Invert Miasma. Then, after following the donut from north to south, run to a safe lane on the other side; this may require running all the way across the arena.
- If only the outer lanes have donuts, the knockback will be from north to south. Both of the middle lanes will be square + circle. Get knocked back and then go to the one that is safe depending on Manipulate/Invert Miasma. Then walk into adjacent lanes after 3x line explosions, much like the second Weave Miasma mechanic.
An unmarked conal AoE on a random player. Get behind the boss.
The boss will cast a buff on itself which slows and deals damage to attackers. This must be dispelled.
Malediction of Agony
Weave Miasma
Manipulate Miasma
Weave Miasma
Invert Miasma
Manipulate Miasma
Summon
Malediction of Agony
Weave Miasma
Summon
Manipulate Miasma
Vile Wave
Malediction of Agony
(i actually have no idea what happens after here guys)
Strategy
- Keep up Lost Banish at all times.
- Pre-mitigate the first raidwide.
- For the first Weave Miasma, the bottom row will always go off first. The safe spot is usually A or D on the north side, and then players must move with the donut AoE south. Make sure not to run into the death wall when moving south.
- Immediately after, wait for the three line AoE pulses beside your lane to go off, and then move into it.
- For Invert Miasma, go to a line with a glowing green circle – this will either be A or C. Wait until the three line AoE pulses go off, and then move into the line AoE. Stay there, and again, wait until the three line AoE pulses go off in the original lane, and move back.
- For the adds, healers should focus on healing the Misty Wraiths to full, while DPS and tanks kill the Bloody Wraiths. WHM’s Benediction instantly heals them, so if you have many WHMs save them for this section and coordinate usages.
- Immediately after the boss is targetable, silence it. It will not do anything until after it was originally supposed to enrage.
- Players will need to get knocked back into the safe spot for the next Weave Miasma. Go to the side of the arena where the Summon ghost is, and get knocked back into the correct donut AoE. Follow it just like the first one, and then move to the closest line AoE after it pulses thrice.
- Move to the boss and get behind it for Vile Wave.
- At this point, the boss should be dead.
- Afterwards, Ice Spikes should be dispelled and the tank buster needs to be mitigated. Do the Summon + Manipulate Miasma again.
Loot
One chest is lootable after the Bozjan Phantom. This will drop two random Pure Fragments.
Post-Bozjan Phantom
Pick up your chest and stay in the arena. There will be traps in the hallways after Bozjan Phantom, so players must be careful to not trigger any traps. Let the players with Lost Perception scout ahead to reveal traps. After going down the stairs, there are more traps – be careful not to trigger any, especially because Mini is required to finish the encounter later on.

Trinity Avowed
Timestamp: Xeno
Trinity Avowed is fought in the Vault of Singing Crystal and is the fifth boss in Delubrum Reginae.
Required Lost Actions
- Lost Aethershield is basically required for mitigating the raidwide. It is enough for one tank in each party to have Aethershield.
Mechanics
Trinity Avowed will pull out a weapon and do a mechanic based on the weapon. The subsequent set of mechanics in the phase will depend on the weapon.
- Bow – Flashwipe: Turns to a random player and does a 270 degree cleave. Get behind the boss.
- Sword – Infernal Slash: Does a 270 degree cleave behind her. Get in front of the boss.
- Staff – Fury of Bozja: A circle AoE around Trinity Avowed. Get away from the boss.
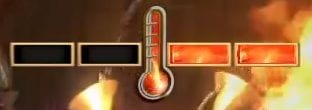
Players will gain a temperature gauge and the Intemperate debuff. The gauge is indicated by a meter on your screen, showing how Hot or how Cold you are. This gauge will go from -2 to +2. When the Intemperature buff resolves, players must have a temperature of 0 or they will die. Getting hit by certain mechanics will increase or decrease your temperature. If you gain more than two stacks of Hot or Cold, you will also die.
Players gain a debuff that changes their temperature when it resolves. This can also range from -2 to +2. This will resolve after the main mechanic that changes players temperatures, so you must adjust for this when calculating what you need to get hit by. The brands are:
 – Hot Brand: +2
- – Hot Brand: +1
- – Cold Brand: -1
- – Cold Brand: -2
Forces players to move in the direction indicated by the debuff when it resolves. This will always move the player two tiles in that direction. Do not Sprint, as it will move you further.
Trinity Avowed summons adds on the outside of the arena that shoot a line AoE down the row or column they are on.
A conal AoE tank buster on the MT that hits three targets for massive damage. Tanks need to stand together and mitigate.
A heavy magical raidwide that inflicts a bleed debuff. Use mitigation such as Lost Aethershield and heal through it.
Sword
Trinity Avowed summons three clones, which turn and cleave one side relative to them with Blade of Entropy. Each cleave will have a temperature indicator showing how much your temperature will increase or decrease if you are hit by that cleave.
Bow
Trinity Avowed will cover most of the room in lava, indicated by a flame on east or west of the arena. There will be a safe small column on the east or west side of the room. Players must move away from the fire to the opposite edge into the safe spot.
Arrows will appear on the far side of the room relative to the safe spot. These will have a temperature indicator showing how much your temperature will increase or decrease if you are hit by that arrow. They will travel down the paths in the fire, turning whenever possible. Each arrow will hit one square tile, with one square tile not being hit by any arrow.
Staff
Trinity Avowed summons four proximity meteors at the intercardinal edges. These meteors will drop orbs that do an AoE, which have a temperature indicator showing how much your temperature will increase or decrease if you are hit by that arrow.
Fight Mechanics
Each Allegiant Arsenal will signal the beginning of a weapon phase. The order will depend on the order it first casts Allegiant Arsenal, which is completely random. The first set will be the first set of mechanics (1), while the second set will be the second set of mechanics (2).
Wrath of Bozja
Glory of Bozja
Allegiant Arsenal 1
Allegiant Arsenal 2
Allegiant Arsenal 3
Allegiant Arsenal 1
Allegiant Arsenal 2
Allegiant Arsenal 3
Allegiant Arsenal 1
Allegiant Arsenal 2
Hot and Cold
Unwavering Apparition
Blade of Entropy
Blade of Entropy
Glory of Bozja
Hot and Cold
Quick March
Freedom of Bozja
Elemental Impact
Glory of Bozja
Quick March
Wrath of Bozja
Flames of Bozja
Hot and Cold
Shimmering Shot
Glory of Bozja
Hot and Cold
Elemental Brand
Unwavering Apparition
Blade of Entropy
Blade of Entropy
Glory of Bozja
Hot and Cold
Elemental Brand
Freedom of Bozja
Unseen Eye
Elemental Imapct
Glory of Bozja
Unseen Eye
Flames of Bozja
Hot and Cold
Elemental Brand
Quick March
Shimmering Shot
Glory of Bozja
Wrath of Bozja
Enrage is a short casted Glory of Bozja that wipes the raid after all mechanic sets have been done once.
Strategy
The main mechanic of this fight is Hot and Cold, which is mainly a personal responsibility mechanic. Players can be told which options are safe, but it is up to them to figure out what configuration of Hot and Cold mechanics they will need to get hit by in order to solve Intemperate. I find that the easiest way to think about it is Cold is negative and Hot is positive, and think of it as an addition/subtraction problem.
- Mitigate the first Wrath of Bozja and heal + mitigate the first Glory of Bozja.
- You are able to react to which weapon it is based on the text cue. Perform the mechanics and remember what order they are in.
- The third mechanic will be the first weapon phase, the very first mechanic will be the second, and the second mechanic will be the last. This order will repeat for the second set.
Sword 1
- Stand in front of the boss for Allegiant Arsenal. It will move north, but players are able to DPS until after Unwavering Apparition, which then the boss becomes untargetable.
- For this Hot and Cold, players must get hit by cleaves such that their temperature is neutral.
- The easiest way to solve this mechanic is using the + strat. There will be one spot in the four spots that is safe from all cleaves. The tiles directly adjacent NESW of that tile will get hit by one cleave only. Therefore, find the safe spot, and find which cleave in the adjacent tile you need to get by hit.
- The mechanic repeats once more, so stand on the safe tile if you do not need to be hit by anything, and get hit by a cleave if you need to become Intemperate.
- Heal and mitigate Glory of Bozja.
Staff 1
- Get away from the boss for Allegiant Arsenal.
- All players should stack in the centre to reduce proximity damage.
- For this Hot and Cold, players must be moved via Quick March to the correct AoE that changes their temperature to neutral.
- After the orbs appear, quickly find the orb that you need to get hit by, and figure out what orientation you need to stand in to get Quick Marched into that orb.
- Heal and mitigate Glory of Bozja.
Bow 1
- Get behind the boss for Allegiant Arsenal.
- Tanks must stack in front and mitigate Wrath of Bozja.
- Players will need to be Quick Marched to the safe spot for Flames of Bozja. It will either be on the west or the east – have someone call out where you are going via letter marker quickly. Orient yourself correctly based on your Quick March debuff.
- For this Hot and Cold, players will need to figure out what tile out of the five tiles they need to stand on. Each tile will get hit by one arrow that spawns after Shimmering Shot, and each arrow will have a temperature indicator. Players must get hit by the arrow that changes their temperature to neutral.
- Arrows will go down the lane, and always turn if possible. Follow the arrow’s path with your mouse to determine which tile you need to go to.
- Heal and mitigate Glory of Bozja.
Sword 2
- Stand in front of the boss for Allegiant Arsenal. It will move north, but players are able to DPS until after Unwavering Apparition, which then the boss becomes untargetable.
- Starting with the second set, players will get Elemental Brands with their Hot and Cold mechanic. This will change their temperature at the end of the debuff, which is after the Blade of Entropy mechanic.
- The Blade of Entropy mechanic is the same as the last one, so players must get cleaved such that the Elemental Brand debuff will change your temperature to neutral afterwards.
- For example, if you have Hot 2 (+2), and your Elemental Brand is Cold 1 (-1), you have to get hit by the Cold 1 (-1) cleave. You will be Hot 1 (+1) after the cleaves, then the Brand will give you Cold 1 (-1). You will be at 0.
- This is the only weapon phase where you might have to be hit by two cleaves in order to properly do the temperature + brand.
- Heal and mitigate Glory of Bozja.
Staff 2
- Get away from the boss for Allegiant Arsenal.
- All players should stack in the centre to reduce proximity damage.
- Starting with the second set, players will get Elemental Brands with their Hot and Cold mechanic. This will change their temperature at the end of the debuff, which is after the orb AoE.
- For this Hot and Cold, players must manually move to the correct AoE such that the Elemental Brand debuff will change your temperature to neutral afterwards.
- In addition, there will be line AoEs going through the arena. Each corner will have a safe spot out of four tiles from the line AoEs.
- Heal and mitigate Glory of Bozja.
Bow 2
- Get behind the boss for Allegiant Arsenal.
- Players must dodge the line AoEs, then quickly run to the safe side for Flames of Bozja.
- Starting with the second set, players will get Elemental Brands with their Hot and Cold mechanic. This will change their temperature at the end of the debuff, which is after the Arrows explode.
- For this Hot and Cold, players must get Quick Marched to a tile that is hit by an arrow such that the Elemental Brand debuff will change your temperature to neutral afterwards.
- Here is a clip showing how to execute this correctly:
- The arrows function the same as before.
DPS the boss down and pump damage to beat the enrage.
Loot
One chest is lootable after Trinity Avowed. This will drop one Runner’s Plating (Leg Gear) with a small chance to drop an Orderly Runner’s Secrets (Leg Gear).
Post-Trinity Avowed
The path to the Queen is open, but she has the Royal Favor buff, which maximizes her battle prowess. To remove this buff, we will have to fight another secret boss, the Stygimoloch Lord. To unlock the path to this boss, one player (or many, it doesn’t matter) must activate the Mini trap in the room before Trinity Avowed. This player will have to move to the gate right in front of the portal in front of the lion statue. The mini status allows them to move under the gate, which then the gate opens for everyone and a hidden staircase is unlocked.
There are a total of two traps in the room after the staircase and one trap in the hallway leading to the Stygimoloch Lord. Let players with Lost Perception clear the traps out first.
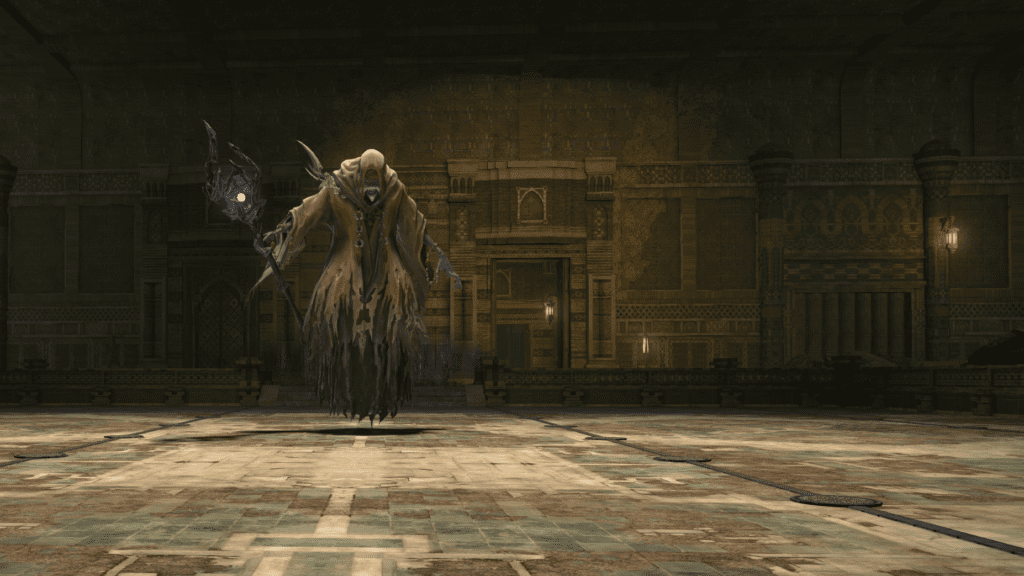
Stygimoloch Lord
Timestamp: Xeno
The Stygimoloch Lord is fought in the Vault of Singing Crystal and is the sixth boss in Delubrum Reginae. This is a mini-boss, and as such is not as long and players will not be able to receive LB3. Place markers the same way as Trinity Seeker – ABCD at cardinals, 1234 at intercardinals.
This encounter has a lot of personal responsibility during the main phase, which has tanks kite four adds around the arena while players DPS them down. The boss will become invulnerable during this phase and throw mechanics at players, which must be handled by each person.
Starting from this mini-boss onwards, the Thrice-come Ruin is changed to a Twice-come Ruin, inflicting Doom if players fail two mechanics instead of three.
Required Lost Actions
- Lost Reflect is required to kill the Balls of Fire in the adds phase.
- Lost Dispel is required to kill the Balls of Earth in the adds phase.
- Lost Perception is required to reveal traps in the adds phase.
- Lost Manawall and Resistance Medkits are useful, but not necessary for tanks.
Mechanics
Stygimoloch Lord
A physical cleave tankbuster on the MT. Everyone else should stand behind the boss.
An untelegraphed point-blank knockback AoE from the boss. Knockback preventions do work.
A conal AoE on a random player. This happens thrice.
Moderate raidwide magical damage.
Marks three players with a lightning AoE circle. When this circle expires, they drop a ring of pulsating lightning. Bring these out to the sides of the arena.
A large AoE centered on the boss. Players need to get out to the edges and avoid the Rapid Bolts.
The Stygimoloch Lord jumps to a random player, dealing proximity damage from the landing area.
Adds Phase
When the adds phase starts, the boss will jump to the middle of the arena and become invulnerable and untargetable. The arena will change: there will be two safe rings – an inner ring and an outer ring – as well as nooks in each ring. The purple areas will instantly kill players, but it does not arm instantly, allowing players to get in position. The boss will still cast mechanics, which can be seen in the enemy list. Four Stygimoloch Monks will spawn, NESW of the boss, as well as Balls of Fire and Balls of Earth repeatedly.
When all four Stygimoloch Monks are killed, the adds phase will end.
These must be tanked by one tank each. These adds will tether to each other if close to each other, making them move extremely fast. When these adds are in the purple zone, they will move extremely slow. Auto-attacks from these adds inflict Twice-come Ruin, meaning tanks will have to establish initial aggro, and each kite the adds around the room clockwise while the rest of the raid DPSes them down.
These cast Mana Flame, a large point-blank AoE. This must be Lost Reflected to kill the Ball quickly.
These will spawn with a massive Stoneskin which can be dispelled. They must be Lost Dispelled and killed before they cast their enrage, which deals massive raidwide damage and inflicts a stack of Twice-come Ruin.
The boss and all four adds will stop and summon traps on the outer ring of the arena. These must be revealed and triggered. Only Explosion and Poison traps are present here.
Inflicts players with either Wanderer’s Fate or Sacrifice’s Fate. These debuffs will be triggered upon the cast of Fateful Words:
- If a player has Wanderer’s Fate, they will be knocked back from the centre.
- If a player has Sacrifice’s Fate, they will be drawn into the centre.
The length of this draw-in and knockback is one nook in the ring to the other nook, so players will need to stand in the far or close nook depending on what debuff they have.
Executes the Labyrinthe Fate debuff.
A ring of lightning in the arena rings. Stand in a nook to dodge this.
AoEs under random players. Dodge these.
Foe Splitter
Vicious Swipe
Whack
1111-tonze Swing
Rush
Rush
Adds Spawn
Entrapment
Labyrinthe Fate
Fateful Words
Devastating Bolt
Rending Bolt
Labyrinthe Fate
Devastating Bolt
Rending Bolt
Fateful Words
Rending Bolt
Devastating Bolt
Thunderous Discharge
Rapid Bolts
1111-tonze Swing
Rapid Bolts
Rapid Bolts
Crashing Hoof
Whack
Foe Splitter
Vicious Swipe
Whack
(Repeat)
Strategy
Before pulling, assign one tank to each add at the north, south, east, and west. These tanks should have Lost Perception, invulns ready, and a backup tank in their party to take aggro if they are killed.
Assign one to three players to run around the middle ring to Reflect the Balls of Flame.
Assign one or three players to Dispel the Balls of Earth and kill them. They have minimal HP, so anything will kill them as long as they are dispelled.
Simply burn the boss and execute the mechanics before the phase change.
Adds Phase
- All melee players should quickly head to the outer ring and hold DPS until tanks establish initial aggro on the Stygimoloch Monks. Tanks can only use their ranged ability to avoid being auto-attacked.
- Ranged players can either stand outside with the melee players or stay on the inside ring. If they stay in the inside ring, they must be careful to avoid the AoE from the Balls of Flame.
- Tanks will need to pick up their add with a ranged ability, standing at the edge. They will then rotate clockwise, kiting the add so it walks through the purple area.
- Players on the inside should avoid Mana Flame.
- The players assigned to Dispelling and Reflecting should do so ASAP and keep doing it until the phase is over.
- To be safe for the first Entrapment, players on the outside should all head north and stay there. The NESW of the arena are free from traps, while the rest of the ring can potentially have traps. There will be one trap per quadrant.
- Exploding a trap with everyone stacked will basically kill everyone, so do not move until the tanks blow up their traps.
- Tanks will use their Lost Perception to scout ahead. All other players should stay. If the tank sees a trap, they will invuln and explode it. Healers should spot heal them and/or cleanse them if needed.
- If the trap is behind you, do not bother popping it. Moving backwards is a death sentence here, as the add will come and auto you. Let the incoming tank pop it instead.
- Melee can start DPSing the adds after traps are popped. Ranged can spread damage onto adds beforehand, but if they rip aggro the run will need to be salvaged so it is not recommended.
- When Labyrinthe Fate is cast, players should check their debuffs to figure out where they should stand when Fateful Words is cast.
- Players with Wanderer’s Fate should stand on the inside nook and players with Sacrifice’s Fate should stand on the outside nook.
- The knockback/draw-in does not happen until Fateful Words, so keep rotating until then.
- The tank should always run further ahead to avoid being auto-attacked by the adds.
- When Fateful Words is cast, go to the correct spot. The raid leader should call out when this is happening.
- Dodge Rending Bolts and Devastating Bolts.
Phase 3
- The final phase is extremely simple and is a victory lap.
- Players with Rapid Bolts need to drop their AoEs on the outer edges of the arena.
- Run out for 1111-tonze Swing and away from Crashing Hoof. Dodge the Whacks.
- Stand behind the boss during the tank buster.
- Mitigate and heal through the tank buster and AoEs.
Collect your chest and move forward through a platform after the arena. The final boss, the Queen, is to the left, and her Royal Favor buff is now gone. Prepare for the final encounter of the raid!
Loot
One chest is lootable after the Stygimoloch Lord. This will drop one Runner’s Plating (Body Gear) with a small chance to drop an Orderly Runner’s Secrets (Body Gear).
The Queen
Timestamp: Xeno
The Queen is fought in the Queensheart and is the seventh and final boss in Delubrum Reginae.
The Queen is a difficult fight filled with high damage and personal responsibility. The main mechanic is Queen’s Edict, which involves players moving around the chessboard to satisfy their own debuffs while dodging line AoEs. Other mechanics present involve the Queen’s Guards, which you have already seen before – understanding their mechanics are paramount to success in this fight.
Required Lost Actions
- Lost Reflect is required to kill the Ball Lightning to form a safe spot.
- Lost Dispel is required to dispel the boss’s buffs.
- Lost Aethershield is required to mitigate the boss AoEs. Both tanks should have
- Lost Aethershield holstered, but only one needs to use it until the end, where both need it.
Mechanics
Heavy raidwide magical damage that inflicts a heavy bleed DoT. Lost Aethershield is basically a requirement to survive this.
A multi-hit tank buster that inflicts a bleed DoT and Doom. This will hit twice, so two tanks will need to provoke, one after the other. Healers must cleanse the Doom inflicted.
Summons chess pieces at the edge of the room. These will shoot a plus shaped AoE after Beck and Call to Arms.
The Queen tethers two chess pieces, forcing them to move forward in the direction they are facing by the number of dots indicated on the chess piece. After moving, they will fire the plus shaped line AoE mentioned previously.
Three orange circles appear in four intercardinal positions. An orange line will grow from these circles. If an orange line intersects with another one, it will emit a giant AoE. Therefore, one side of the room will be safe. The easiest way to find the safe spot is to find the side where two lines are going parallel to each other.
The boss gains the Sovereignty bar. When this is filled, she will teleport, gain four buffs that need to be dispelled, and summon balls of lightning. These Ball Lightnings do a pulsing AoE – this must be reflected. When a ball dies, it leaves behind a puddle which grants a Lightning Resistance Up buff.
A raidwide that instantly kills all players without the Lightning Resistance Up buff from the Ball Lightning puddles.
The main mechanic of the fight, but not the only. The Queen becomes invulnerable and untargetable, summons four chess pieces outside the cardinal edges, places a safe zone in the tile north or south, and inflicts all players with two debuffs – Movement Edict: 2 Squares, Movement Edict: 3 Squares, or Movement Edict: 4 Squares. When the debuff resolves, the player must move the number of tiles indicated by their debuff. Failure to do so will result in death. This will happen twice. Players can only get a combination of debuffs such that the sum of their movements adds up to 5, 6, or 7.
In addition, during this phase, the Queen casts Beck and Call to Arms on the chess pieces on the outside. These will only shoot a line AoE down a column or row – rows first, then columns on the second cast.
Kills all players not in the safe zone. The safe zone is outlined in blue.
The Queen cleaves half the arena plus the middle column of tiles. This is indicated by a glowing sword left or right.
Relentless Play
Relentless Play is the other main mechanic of the fight. The Queen will summon her Queen’s Guards, which are untargetable. The Queen’s Guard will perform mechanics from their encounter here, which will be handled similarly. For brevity I will not restate what the mechanics do – they operate the same as in the earlier fight.
- Reversal of Forces + Automatic Turret
- Reading + Northswain’s Glow
- Winds of Weight + Queen’s Shot
- Turret’s Tour
For this Relentless Play, players must go to the safe spot for Winds of Weight, face their open side from Reading to the Queen’s Gunner, and then face it towards the Automatic Turrets on the outside of the arena. However, because of Northswain’s Glow, only one wind and one lightning spot will be safe. Have the raid leader call out the safe spot, and go to your respective element – tethers to wind, non-tethers to lightning.
- Shield Omen
- Double Gambit + Optimal Offensive + Judgment Blade
- Secrets Revealed
- Judgment Blade
For this Relentless Play, players must be knocked to the same side of the dash while avoiding the orb AoE. Players must then find the untethered soldier AoEs for Double Gambit (they do not jump around this time) and go to either of them, dodging the Judgment Blade.
- Sword Omen OR Shield Omen + Automatic Turret
- Optimal Play
- Turret’s Tour
For this Relentless Play, players will do the Sword Omen (AoE) OR Shield Omen (donut) Optimal Play, going to the side that is not being cleaved. They will then dodge the Turret AoEs.
- Bombslinger
- Reversal of Forces
- Heavens Wrath
- Fiery Portent OR Icy Portent
- Above Board
For this Relentless Play, players will get knocked back into the correct bomb for Bombslinger via Heavens Wrath. After the knockback, players must move or stand still for the Portent, then stay at the bomb for Above Board. Tethered players must move to avoid being hit by the bomb explosion.
- Blood and Bone + Blood and Bone
- Blood and Bone + Queen’s Shot
- Blood and Bone + Blood and Bone
- Blood and Bone + Queen’s Shot
- Empyreal Iniquity
- Blood and Bone
- Blood and Bone
- Blood and Bone
- Queen’s Shot
For this Relentless Play, The Queen’s Guards will repeatedly do heavy AoEs, and the Queen will also cast an Empyreal Iniquity. Players must heal and mitigate through the AoEs. Lost Aethershield is basically required, and you will need two – one for the initial AoEs, and one for the Empyreal Iniquity and AoEs after.
- Reversal of Forces + Automatic Turret
- Reading + Northswain’s Glow
- Winds of Weight + Queen’s Shot
- Turret’s Tour
For this Relentless Play, players must go to the safe spot for Winds of Weight, face their open side from Reading to the Queen’s Gunner, and then face it towards the Automatic Turrets on the outside of the arena. However, because of Northswain’s Glow, only one wind and one lightning spot will be safe. Have the raid leader call out the safe spot, and go to your respective element – tethers to wind, non-tethers to lightning.
- Shield Omen
- Double Gambit + Optimal Offensive + Judgment Blade
- Secrets Revealed
- Judgment Blade
For this Relentless Play, players must be knocked to the same side of the dash while avoiding the orb AoE. Players must then find the untethered soldier AoEs for Double Gambit (they do not jump around this time) and go to either of them, dodging the Judgment Blade.
- Sword Omen OR Shield Omen + Automatic Turret
- Optimal Play
- Turret’s Tour
For this Relentless Play, the Knight will jump to a random player. Players will do the Sword Omen (AoE) OR Shield Omen (donut) Optimal Play, going to the side that is not being cleaved. They will then dodge the Turret AoEs.
- Bombslinger
- Reversal of Forces
- Heavens Wrath
- Fiery Portent OR Icy Portent
- Above Board
For this Relentless Play, players will get knocked back into the correct bomb for Bombslinger via Heavens Wrath. After the knockback, players must move or stand still for the Portent, then stay at the bomb for Above Board. There is a tiny period of time players can adjust after the Portent. Tethered players must move to avoid being hit by the bomb explosion.
- Blood and Bone + Blood and Bone
- Blood and Bone + Queen’s Shot
- Blood and Bone + Blood and Bone
- Blood and Bone + Queen’s Shot
- Empyreal Iniquity
- Blood and Bone
- Blood and Bone
- Blood and Bone
- Queen’s Shot
For this Relentless Play, The Queen’s Guards will repeatedly do heavy AoEs, and the Queen will also cast an Empyreal Iniquity. Players must heal and mitigate through the AoEs. Lost Aethershield is basically required, and you will need two – one for the initial AoEs, and one for the Empyreal Iniquity and AoEs after.
Empyrean Iniquity
Queen’s Will
Northswain’s Glow
Beck and Call to Arms
Beck and Call to Arms
Cleansing Slash
Empyrean Iniquity
Queen’s Edict
Beck and Call to Arms
Beck and Call to Arms
Gunnhildr’s Blades
Gods Save the Queen
Sovereignty
Maelstrom’s Bolt
Relentless Play 1
Cleansing Slash
Relentless Play 2
Empyrean Iniquity
Queen’s Edict
Beck and Call to Arms
Beck and Call to Arms
Gunnhildr’s Blades
Cleansing Slash
Relentless Play 3
Sovereignty
Maelstrom’s Bolt
Empyrean Iniquity
Relentless Play 4
Relentless Play 5
Sovereignty
Enrage
Enrage is a long casted Gods Save the Queen that instantly wipes the party. Do not bother dispelling Sovereignty’s debuffs.
Strategy
Phase 1
- Pre-mitigate for the first Empyrean Iniquity and heal through it.
- Find the safe side for Northswain’s Glow, and move towards it. Find a safe spot for the first Beck and Call to Arms. There can be multiple on the side, so make sure you are on a correct one that is not being hit by the charge.
- Some of these chess pieces may be moving inside the arena. Since they do a plus shaped AoE, they will hit the entire row and column they are in.
- It may be a good idea to mark one player who focuses on finding the safe spot, and all players go to that marked player.
- Do the second set of Beck and Call to Arms.
- The tanks should swap off each other for Cleansing Slash. The second tank taunts off the first one during the cast, and the third taunts after the second tank is hit. Healers should cleanse all Dooms and top off the tanks for their bleed.
- Mitigate and heal the raidwide, and do the first Queen’s Edict. There is a section below this explaining how to execute the mechanic.
Phase 2
- As the boss comes back, she will do some RP and then cast Gods Save the Queen. Mitigate heavily for this, and the players with Lost Dispel and Lost Reflect should get ready to perform their roles.
- The players with Lost Reflect need to find the closest Ball Lightning to the boss and reflect it. Have one player call it out. All other players should avoid the Ball Lightning AoE.
- Players with Lost Dispel need to Dispel the four buffs the boss gains.
- After the Ball Lightning puddle appears, players need to run into it to mitigate Maelstrom’s Bolt.
- Do the first Relentless Play trio. The boss is targetable during this time – instructions on how to is written above.
- After the first Relentless Play, tanks will need to mitigate and taunt off each other for Cleansing Slash. Again, healers must cleanse the Dooms.
- Do the second Relentless Play trio. The boss will become untargetable, so simply focus on performing the mechanics.
- As the boss comes back, heal up and mitigate for Empyrean Iniquity.
- Do the second Queen’s Edict.
Phase 3
- As the boss comes back, she will do the tank buster again.
- Do the third Relentless Play trio. The boss is targetable again this time, and it is extremely simple, so get as much uptime as you can.
- Right after the line AoEs go out, it will be time for Dispel and Reflect again. Do it the same as before.
- Heal up the AoE damage and mitigate Empyrean Iniquity.
- Do the fourth Relentless Play. The boss will become untargetable right as she finishes casting Heaven’s Wrath, so focus on the bombs, tethers, and Portent.
- If bombs are tethered, tethered players get knocked back to big bombs and non-tethered players get knocked back to small bombs.
- If bombs are not tethered, tethers players get knocked back to small bombs and non-tethered players get knocked back to big bombs.
- The boss will reappear in the centre and cast the last Relentless Play. This is a large heal check and DPS check as well, since enrage will be right after.
- Healers need to spam heals. Make sure Lost Seraph Strike’s buff is not active. Swap to Banner of Solemn Clarity if needed.
- Both tanks require Lost Aethershield. The first Lost Aethershield should be used right before the first AoE, and the second Lost Aethershield should be used when the first is about to expire. This will cover all AoEs.
- After this is the hard enrage. Do not bother dispelling the boss and pump DPS to beat the enrage.
Loot
One chest is lootable after the Queen. This will drop one random Orderly Runner’s Secret upgrade item, the Save the Princess minion, five Pure Fragments of Loss, and one Pure Fragment of Deception.
How to do Queen’s Edict
Queen’s Edict resolves its mechanics in three steps:
- The row chess pieces move and do their line AoEs and you are forced to perform the movement for their first debuff.
- The game checks whether or not you did your first debuff right, then the column chess pieces move and do their line AoEs right after.
- Players must then perform the movement for their second debuff into the safe spot north or south.
This means that the first movement must start on a safe tile from the row line AoEs and end on a safe tile from the column line AoEs. This must also be the distance of your second debuff away from the safe spot.
There are a few rules and tricks that players must abide by when doing this mechanic:
- The safe spot is always on a white tile. Therefore, if the sum of your debuff numbers are odd (5, 7) you MUST start on a black tile, and if the sum of your debuff numbers are even (6) you MUST start on a white tile.
- The debuff checks how far away from your original position you are, not how many spaces you have moved. If you move forward two tiles and backwards one tile, you have only moved one tile.
- If you are hit by a line AoE, it likely won’t instantly kill you, but it will inflict a stack of Twice-come Ruin.
- Since the chess pieces start on the second last row/column to the edge and move the other way, either the edge row/column or the one closest to it will be safe.
- You have plenty of time to work out your mechanics. From the Queen’s Edict cast, the first movement debuff goes off 22 seconds later. You have that time to work out how to move for the mechanic.
There are a few ways to do this mechanic. One is the “Intermediate Relativity” strat, where you start on the safe spot and resolve your debuffs backwards. You have plenty of time to do so. Another is the “Wall” strat, where the raid leader calls out whether or not the far wall row or the second-furthest wall row from the safe spot is safe. Either strat works, so learn what you are comfortable with and stick with that. There are many other ways to do it as well.

Either way, here is how to perform the mechanic:
- Stand on the correct tile to start. This must be white if even or black if odd, and be safe from the row line AoEs. Look where the row chess pieces are going to move, and also where the column chess pieces are going to go.
- Move to a safe column from the column line AoEs. This spot must also be the amount of spaces of your second debuff away from the safe spot.
- Move to the safe spot.
This will take some practice to get right, but understand that getting hit by the line AoE isn’t the end of the world. Failing the movement edict is, so make sure you satisfy that above all else. There are many different diagrams and explanations on how to execute this mechanic, so find out what works for you.
Consider this diagram and scenario.
We can see that the furthest row from the safe spot is safe. In addition, the middle row is not safe for the first set. For the column line AoEs, the far left column and the second column from the right is not safe. Our debuffs are IV and III, meaning we need to move four squares first and three squares second. We need to start on a black square. We could solve this multiple ways:

We could start near the safe spot and double back. Alternatively, we know that the far row at the edge is safe. We could solve it there:

We have multiple options here. Of course, if we were on the other side, we wouldn’t have a safe spot to go to and we would get hit by the line AoE. Remember that you should try and calculate the column line AoEs to find a good spot for both of them.
Congratulations!
If you’ve reached the end of the document, you’re either a curious reader wondering what all the mechanics are, or on enrage and ready to kill the Queen! Once you do, you’ll be able to pick up your Cerberus mount from Jonathas in Old Gridania. Get ready to farm back your mettle for 5.5!
Author Credits
Written by Lyra Rose of Gilgamesh.
Big thanks to:
- Alhena Vata for editing and proofreading.
- Levi for formatting and images
- Verzell Varion for additional suggestions and information
- Aether Group 2 for big progression content
Check out my Savage text guides @ https://saltedxiv.com/encounters. My TEA Ultimate guide is hosted here.